Abstract
The process of connecting a hose to an air compressor, while seemingly elementary, represents a critical juncture where safety, efficiency, and equipment longevity converge. An improper connection can lead to diminished tool performance, energy waste through leaks, and, most critically, hazardous high-pressure failures. This document provides a methodical exploration of how to attach a hose to an air compressor, moving beyond simple instructions to foster a deeper understanding of the underlying principles. It examines the distinct mechanics of threaded and quick-connect fittings, outlines a systematic, five-step procedure for achieving a secure, leak-free seal, and addresses the nuanced requirements of various compressor types, from small workshop units to large-scale industrial systems like centrifugal compressors. By contextualizing the practical steps within the physics of pressurized gases and materials science, this guide aims to equip both novice and experienced users with the knowledge to perform this fundamental task with precision, confidence, and a profound respect for the potential energy being harnessed.
Key Takeaways
- Always depressurize the compressor tank before attaching or detaching any components.
- Use PTFE thread seal tape on all male tapered threads for a leak-proof seal.
- Mastering how to attach hose to air compressor prevents costly air leaks and ensures tool efficiency.
- Regularly inspect hoses and fittings for wear, cracks, or corrosion to prevent failure.
- Select hoses and fittings with pressure ratings that exceed your compressor’s maximum output.
- For threaded fittings, tighten one-quarter to one-half turn past hand-tight with a wrench.
The Foundational Importance of a Secure Connection
Before we touch a single wrench or piece of tape, I want you to pause and think about what we are really doing. We are not just connecting a tube to a tank. We are creating a conduit, a carefully sealed pathway for a powerful and invisible force. An air compressor is the heart of a pneumatic system, and the hose is its primary artery. The integrity of the joint between them dictates whether that power is delivered precisely to your tools or bleeds away into the atmosphere, wasted and potentially dangerous.
Beyond Utility: The Compressor as a System’s Heartbeat
Imagine your workshop. The air compressor sits in the corner, a quiet sentinel until it roars to life. It inhales ambient air, compresses it, and stores it as potential energy. This stored energy is the lifeblood for a whole ecosystem of tools: the impact wrench that removes stubborn lug nuts, the nail gun that builds a frame with rhythmic pops, the sander that sculpts wood, the paint sprayer that lays down a flawless finish. Each of these tools is designed to perform a specific dance, and that dance is choreographed by a precise flow of compressed air. A leak at the source, at the very connection we are about to make, is like an arrhythmia—a disruption that weakens the entire system. The impact wrench might lack the torque to break a bolt free; the nail might not seat fully; the paint finish might suffer from pressure drops. Understanding how to attach hose to an air compressor properly is an act of respecting this entire system.
The Physics of Pressurized Air: Why Leaks Matter
Let’s consider the air itself. At 120 pounds per square inch (PSI), a common pressure for workshop compressors, the air inside that hose is desperate to escape. It will exploit any imperfection in our connection—a damaged thread, a missing O-ring, an improperly wrapped piece of tape—to find its way back to equilibrium with the atmosphere. This escape is not a gentle sigh; it is a high-velocity jet of air. A small, hissing leak is more than an annoyance. It is a constant drain on your compressor, forcing the motor to cycle more frequently, consuming electricity, and accelerating wear on the machine’s components. Over a year, a tiny 1/16-inch hole at 100 PSI can waste thousands of dollars in electricity. The U.S. Department of Energy estimates that in many facilities, as much as 30% of compressed air is wasted through leaks. Your connection is the first line of defense against this waste.
Safety, Efficiency, and Tool Longevity: The Trifecta of a Good Seal
The stakes are threefold. First, safety. A catastrophic failure of a hose fitting under pressure can turn it into a projectile. A whipping hose can cause serious injury. Second, efficiency. As we’ve seen, leaks waste energy and money and reduce the performance of your tools. A tool starved for pressure cannot do its job effectively, leading to frustration and poor-quality work. Third, longevity. When a compressor works harder to compensate for leaks, it runs hotter and wears out faster. The same is true for your pneumatic tools, which may be damaged by the inconsistent pressure and flow caused by a poor connection. By mastering this one simple procedure, you are actively protecting your investment, your energy bills, and, most importantly, yourself.
Step 1: Understanding Your Equipment – A Dialogue Between Compressor and Hose
The act of connection is a conversation between two components. To facilitate it, we must first learn the language of each. A successful, leak-free union depends on matching the right parts in the right way. This requires us to become familiar with the ports on the compressor, the characteristics of the hose, and the critical intermediaries that join them: the fittings.
Decoding Compressor Outlets: An Introduction to Ports and Regulators
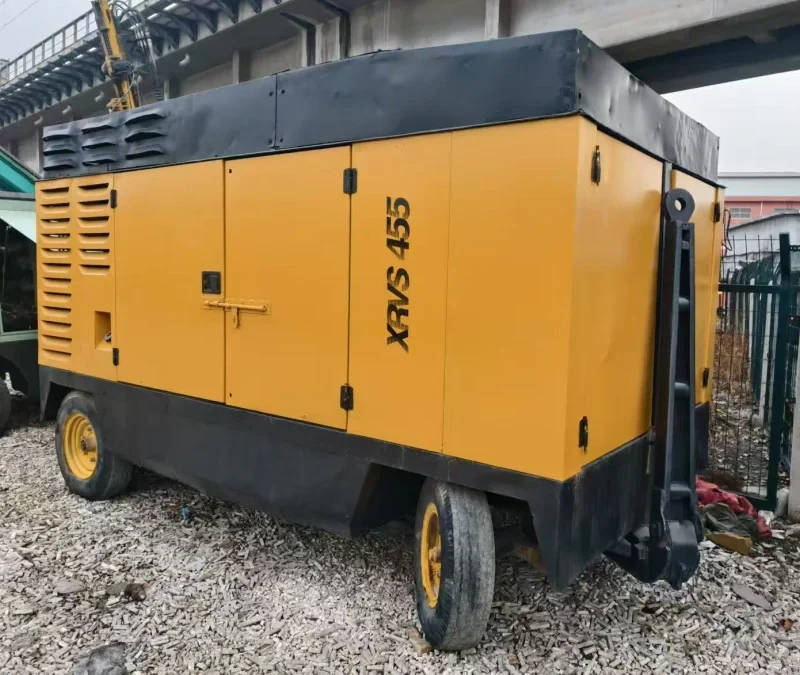
Look at your air compressor. You will typically find one or more outlets, often accompanied by gauges and a regulator knob. The main port directly on the tank provides unregulated, full-tank pressure. This is rarely where you attach your primary tool hose. Instead, you will use the regulated port. The regulator is a T-shaped knob that allows you to dial in the specific pressure required for your tool, which is displayed on an adjacent gauge. This regulated port is where our journey begins. It will have a threaded opening, almost always female, of a specific size. The most common sizes in North America for consumer and light professional compressors are 1/4-inch or 3/8-inch National Pipe Thread (NPT). It is vital to know this size, as it dictates the fitting you will need.
The Language of Hoses: Materials, Diameters, and Pressure Ratings
An air hose is not just a simple tube. It is an engineered component. Hoses come in various materials—rubber, PVC, polyurethane, or hybrid polymers—each with different characteristics of flexibility, durability, and weight. More important for our connection, however, are two specifications: inner diameter (ID) and maximum pressure rating. The inner diameter, typically 1/4-inch, 3/8-inch, or 1/2-inch, affects the volume of air (measured in Cubic Feet per Minute, or CFM) the hose can deliver. A larger diameter is needed for high-demand tools like sanders or heavy-duty impact wrenches. The pressure rating, given in PSI, MUST exceed the maximum pressure output of your compressor. Using a 150 PSI hose on a 175 PSI compressor is courting disaster. Always check the manufacturer’s markings on the hose.
The Crucial Intermediaries: A Tale of Two Fittings (Quick-Connect vs. Threaded)
You will almost never attach a hose directly to the compressor’s regulator port. You will use fittings. These fall into two main families: threaded fittings and quick-connect (or quick-disconnect) fittings.
- Threaded Fittings: These are the semi-permanent foundation of your air system. They create a robust, sealed connection using tapered threads that wedge together. You will use a male threaded fitting to screw into the female port on your compressor’s regulator. The other end of this fitting might then connect to a quick-connect coupler or directly to a threaded hose end.
- Quick-Connect Fittings: These are the epitome of convenience. They consist of two parts: a female coupler (usually attached to the hose end coming from the compressor) and a male plug (attached to the tool or the tool-end of the hose). The coupler has a retractable sleeve that allows the plug to be inserted and locked into place by internal ball bearings. This allows for rapid tool changes without wrenches. There are many styles (Industrial, Automotive, ARO), and they are generally not interchangeable. It is wise to standardize on one style for your entire workshop.
Comparison Table: Quick-Connect vs. Threaded Fittings
To better visualize the roles of these components, consider the following comparison:
| Feature | Threaded Fittings | Quick-Connect Fittings |
|---|---|---|
| Primary Use | Semi-permanent connections (e.g., regulator to hose reel) | Rapid tool/hose changes |
| Connection Method | Wrench-tightened threads with sealant | Push-to-connect sleeve mechanism |
| Seal Mechanism | Tapered threads deforming against each other; sealant | Internal O-ring in the coupler sealing against the plug |
| Convenience | Low; requires tools for assembly/disassembly | High; tool-free, one-handed operation |
| Flow Restriction | Generally lower | Can be slightly higher due to internal mechanism |
| Common Failure | Leaks from improper sealing or over-tightening | Leaks from worn O-rings or mismatched plug/coupler styles |
Step 2: Preparing for the Union – The Ritual of Connection
With a solid understanding of our components, we can now prepare them for assembly. This stage is about diligence and foresight. A few moments spent here will save you hours of troubleshooting later. Think of it as a pre-flight checklist; every step is essential for a safe and successful outcome.
Safety First: Depressurizing the System
Before you ever put a wrench to a fitting on a compressed air system, you must ensure it is completely depressurized. This is a non-negotiable rule.
- Turn off the compressor’s power switch.
- Unplug it from the wall. This prevents it from unexpectedly starting up.
- Open the drain valve at the bottom of the tank to release all stored air. You will hear a loud hiss that will gradually fade. Wait until it is completely silent.
- Observe the tank pressure gauge. It should read zero. Do not proceed until it does. Working on a pressurized system can result in severe injury from ejected parts.
Inspecting the Components: A Tactile Examination
Now, with the system safe, pick up the parts you intend to connect. Look at them. Feel them.
- Threads: Examine the male and female threads. Are they clean? Is there any old, shredded thread tape or sealant gunked up in them? Are the threads sharp and well-defined, or are they flattened, cross-threaded, or damaged? A small wire brush can be used to clean out old debris. If the threads are damaged, the fitting must be replaced. Do not try to force a damaged fitting; it will never seal properly and may damage the component it is screwed into.
- Hoses: Look for cracks, bulges, or abrasions along the length of the hose. Check the crimps where the fittings are attached to the hose ends. Are they secure?
- Quick-Connects: If you are installing or inspecting quick-connects, check the O-ring inside the female coupler. Is it dry, cracked, or missing? A drop of silicone lubricant can help, but if it is damaged, it needs to be replaced. Check that the sleeve on the coupler retracts and springs back smoothly.
The Role of Thread Sealant: A Necessary Bond
A common misconception is that the threads themselves create the seal in an NPT fitting. They do not. The seal is created by the deformation of the threads as they wedge together, but this process leaves microscopic gaps. The role of thread sealant is to fill these gaps. You have two primary choices:
- PTFE Tape (Teflon Tape): This is a thin ribbon of Polytetrafluoroethylene film. It acts as both a lubricant, allowing the threads to be tightened further, and a sealant, filling the voids. It is clean, easy to apply, and suitable for most air applications.
- Pipe Dope (Liquid/Paste Sealant): This is a paste-like compound that is brushed onto the threads. It also lubricates and seals. Some formulas are resistant to vibration, while others are designed for specific chemicals. For general air use, PTFE tape is usually sufficient and less messy.
Step 3: Mastering the Threaded Connection – A Methodical Approach
This is where precision matters. The goal is to create a seal that is tight enough to prevent leaks but not so tight that you damage the threads or the fitting itself. We will be focusing on using PTFE tape, the most common method for workshop compressors.
Applying Thread Seal Tape (PTFE): The Art of the Wrap
The direction of the wrap is the single most important detail. You must wrap the tape in the same direction that the fitting will be tightened (clockwise for standard threads). If you wrap it the wrong way, the act of screwing the fitting in will unravel the tape, rendering it useless.
- Hold the male fitting in one hand with the threads facing you.
- Place the end of the tape on the second thread from the end. Leaving the first thread bare helps prevent the tape from shredding and potentially entering your air line, where it could clog a tool.
- Wrap the tape clockwise, keeping it flat and applying gentle tension so it conforms to the threads.
- Overlap the tape by about half its width on each successive turn.
- Complete three to four full wraps. For fittings that are worn or have looser tolerances, you might need more. For new, well-machined fittings, two to three may suffice.
- Snap the tape off. You do not need to cut it. Smooth the loose end down against the threads. The finished wrap should look clean and tight, with the thread pattern still visible through the tape.
Hand-Tightening: The Initial Engagement
With the sealant applied, you can begin the connection. Always start by threading the fitting by hand. This allows you to feel the threads engage. It should screw in smoothly for several turns. If you feel any resistance, stop immediately. You are likely cross-threading. Back the fitting out completely, inspect the threads on both parts again, and try again. Forcing it will permanently damage the components.
The Wrench’s Role: Achieving the Final Torque
Once the fitting is hand-tight, it is time for the wrench. You do not need a massive pipe wrench. An adjustable crescent wrench or a properly sized open-end wrench will do. The goal is not to apply brute force.
- Place the wrench on the flats of the fitting you are tightening. Use a second wrench to hold the component you are screwing into (the regulator, for example) to prevent it from turning.
- Tighten the fitting an additional one-quarter to one-half turn past hand-tight. You will feel the resistance increase as the tapered threads wedge together.
- That is it. Resist the temptation to keep tightening until it stops moving. This is how threads get stripped and fittings get cracked. The PTFE tape is doing the sealing work. The wrench is just providing the necessary compression.
Avoiding Common Pitfalls: Cross-Threading and Over-Tightening
These two errors are the most common causes of failed threaded connections. Cross-threading occurs when the threads are misaligned upon starting. The “start it by hand” rule is the best prevention. Over-tightening is a crime of enthusiasm. Remember that brass and aluminum fittings, common in air systems, are relatively soft metals. You can easily deform or crack them with too much force. The feeling of a properly tightened NPT fitting is something you will learn with experience. It is a firm, solid stop, not a dead stop against which you must strain.